Embossing vs Debossing: Tactile Branding That Photographs Well
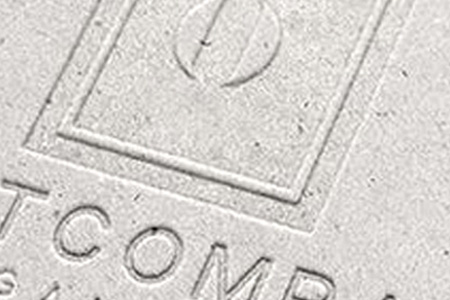
Embossing vs debossing is a choice between two directions of the same idea: embossing raises a logo or pattern above the paper surface, while debossing presses it inward. Both create tactile branding without changing the box structure, but they do not communicate the same mood, photograph the same way, or suit every paper equally. The right choice starts with the material, the artwork and the moment when your customer first touches the pack.
From our factory perspective, the best result is rarely “add texture everywhere.” It is one controlled relief element placed where fingers and light will find it: a wordmark on a rigid-box lid, a seal on a folding carton, or a small emblem on a paper bag.
Embossing vs debossing at a glance
| Decision factor | Embossing | Debossing |
|---|---|---|
| Surface direction | Raised above the sheet | Pressed into the sheet |
| Visual effect | Catches side light and creates a visible highlight | Creates a recessed shadow and quieter depth |
| Brand tone | Expressive, decorative, presentation-led | Restrained, architectural, understated |
| Best artwork | Bold logos, monograms, borders and simple patterns | Wordmarks, seals, geometric marks and minimal graphics |
| Natural pairing | Foil or a clean printed color | Uncoated, textured or solid-color paper |
| Main risk | Fine details can become visually busy | A shallow impression may disappear in flat lighting |
Neither option is automatically more premium. Premium comes from control: clean artwork, enough open space around the mark, a paper that holds the impression, and registration that keeps the relief aligned with the print or foil.
What embossing does well
Embossing pushes the selected artwork upward, giving a flat printed surface a focal point you can see and feel. The raised edge catches light from several angles, so a logo remains visible even when the print color is subtle. This is why embossing works well on presentation packaging that will be handled, photographed and opened slowly.
On our custom rigid boxes, embossing is commonly considered for lid logos, border frames and repeating patterns. Rigid boxes use 1200–2000 gsm greyboard wrapped with printed or specialty paper, so the relief is created on the wrap before that sheet is positioned around the board. The visual-positioning machine then aligns the printed wrap to the box within fractions of a millimeter, keeping the tactile element centered across the run.
Embossing also suits custom printed boxes when the carton needs a premium shelf signal without changing its efficient folding structure. Those cartons use 250–400 gsm cardstock and can combine CMYK or PMS printing with lamination, foil, spot UV and embossed details. The important design discipline is to choose one hero area rather than forcing relief into every line of copy.
What debossing does well
Debossing presses the mark below the surface. Instead of reflecting from a raised edge, it creates a small shadow inside the impression. The result feels quieter and more structural, especially on a solid field of black, kraft or specialty paper.
That makes debossing a strong fit for brands that want the paper itself to carry the identity. A recessed wordmark on textured specialty paper can look intentional without metallic foil or a high-gloss coating. It also works on minimalist packaging where an embossed mark might compete with photography or dense front-panel information.
The trade-off is visibility. A debossed mark depends on depth, shadow and touch. If the front panel already contains busy CMYK artwork, the impression can disappear. In that situation, simplifying the surrounding print or moving the deboss to a lid, side panel or inside reveal usually gives it room to work.
The factory sequence matters
Tactile finishing is not an isolated decoration added after a box is complete. It has to fit the production sequence.
For folding cartons, the artwork is printed on our Heidelberg CD102 or PM74 offset presses, using CMYK and PMS spot colors as required. If the design calls for matte, gloss or soft-touch film, the printed sheet goes through the automatic film-laminating machine before the later converting stages. The relief must then stay registered to the printed logo before the sheet is die-cut and glued.
For rigid boxes, the printed or specialty wrap receives its specified surface finishes before wrapping. The finished sheet is then aligned to the greyboard on the rigid-box visual positioning machine. This sequence is why a tactile logo should be decided before the dieline and sample are approved: its location affects print registration, panel boundaries and the final hand feel.
This is also why we show our actual press and finishing capabilities rather than treating “premium finish” as one bundled label. Heidelberg offset printing, CTP plating, automatic film lamination, die-cutting, gluing, V-grooving, hot foil stamping and visual positioning each solve a different part of the finished package.
A real material-and-product decision table
The useful question is not only “raised or recessed?” It is “raised or recessed on which construction?” These are the combinations we can evaluate from the materials and product lines already running in our 5,000 m² Dongguan factory:
| Packaging construction | Available base material | Practical tactile direction |
|---|---|---|
| Rigid gift box | 1200–2000 gsm greyboard with 157 gsm art paper or specialty-paper wrap | Embossed lid logo for a visible focal point; debossed wordmark for a quieter solid-color wrap |
| Folding carton | 250–400 gsm white, art, kraft, metallic or specialty cardstock | Keep relief on a clear front-panel area and confirm it against folds and die-cut lines |
| Paper bag | 157–250 gsm art paper, kraft, black card or specialty paper | Use a compact logo area so the tactile mark supports rather than weakens the large flexible panel |
| Wine or spirits box | Greyboard or corrugated construction with black, textured, metallic or leatherette-style wraps | Pair relief with a crest, name or border that remains legible beside foil and ribbon details |
| Tags and cards | 300–800 gsm art, black, kraft or cotton-core card | Use the same finish language as the main box for a consistent brand system |
This table is not a substitute for a physical proof. A screen cannot show depth, edge sharpness or how a mark changes under store lighting. The correct test is the real artwork on the real stock.
When to combine relief with foil, print or lamination
Embossing and debossing can stand alone, but they often work as part of a finish system.
Embossing plus hot foil creates the strongest highlight. The foil supplies metallic reflection while the raised form adds a physical edge. It suits logos, crests and short brand names on rigid gift boxes, wine packaging and premium cartons. Keep the element compact; large metallic areas are better handled as a different finish decision. Our guide to hot foil versus spot UV explains those surface effects separately.
Blind embossing or blind debossing uses no printed color in the relief area. The paper, light and shadow do the work. This is the cleanest route on textured specialty paper, black card or kraft when the brand wants restraint.
Relief over a laminated surface needs proofing because matte, gloss and soft-touch films change how light reaches the raised or recessed area. Matte gives a calm base, gloss adds reflections, and soft-touch adds a velvet texture before the relief is felt. If the base finish is still undecided, compare the options in our matte vs gloss lamination guide.
Five artwork rules before you request a sample
- Choose one hero element. A logo, monogram, seal or border is easier to control than a full page of tactile detail.
- Protect clear space. Relief needs room around it so the shadow and edge are readable.
- Keep it away from structural conflicts. Do not place the main tactile mark across a fold, glue flap, lid edge or critical crease.
- Separate the finish in the artwork. Mark the embossed or debossed area clearly so pre-press can check registration against print, foil and spot UV.
- Approve it in hand. Sampling takes 3–7 days depending on the construction and finish set. Production begins only after the physical sample is approved.
Which one should your brand choose?
Choose embossing when you want the logo to catch light, read quickly in photography and become an obvious touchpoint during unboxing. Choose debossing when you want depth without shine, a quieter identity, or a mark that feels built into the paper rather than applied on top.
For many brands, the answer becomes clear only when both directions sit side by side. Send the box size, quantity, material idea and artwork through our quote and sample request. We will return a detailed quote within 24 hours, prepare the dieline, and produce the pre-production sample on the specified paper and finishes before mass production.